|
|
|
|
Page Views: 910 |
| Hashtags: #VisualBasic60 #ProgrammingforMicrosoftWindows |
| Chapter 4 of this free online course in Visual Basic 6.0. |
| Estimated reading time: 10 minute(s) (2347 words) |

Forms are used, not only for the main window of an application, but for all
of the dialog boxes and even for any floating toolboxes you may create.
Terminology
Even if you think you know what the various user interface elements in
Windows are called, we should get together on them, because in a number of cases
Visual Basic uses different terms than do Windows developers in other languages.
This particular dialog box is the standard, File Open dialog. It's actually
more complex than are most dialogs; even so, it is composed of the same standard
controls you can use when creating one.
Caption
Displays the name of the dialog; access through the form's Caption
property.
What's This? Help
Click this button, and then a control on the form, to bring up the on-line
help for that control. Turn it on and off with the WhatsThisButton
property. Note: In Visual Basic, the What's This? Help button only appears when
both the WhatsThisButton and ControlBox properties are set to True.
Close button
Click this as a synonym for the Cancel button. In Visual Basic, only appears
when the ControlBox property is True.
Label
A control that simply displays text, usually to describe another, more active
control, located nearby. The text is set through the label's Caption
property. (Both labels and forms, and many other objects, have Caption
properties.)
Toolbar
A toolbar is a set of graphical command buttons. The Toolbar control is
designed to display and manage them.
ListView
The ListView control presents a list of items, with or without columns of
supporting information, and with or without associated icons.
Text Box
Displays text, and allows the user to alter that text by typing. Usually used
for user input. The Text property contains the value.
Default Command Button
Like any command button, triggers a Click event when pressed by the
mouse. The default command button additionally clicks if the user presses the
Enter key on the keyboard.
Cancel Command Button
Like any other command button, but additionally clicks when the user presses
the Escape key.
Adding a Form to Your Project
To add any module to your project, you use the Project..Add commands
(as seen in the previous chapter). To add a form, use the Project..Add Form
menu command.
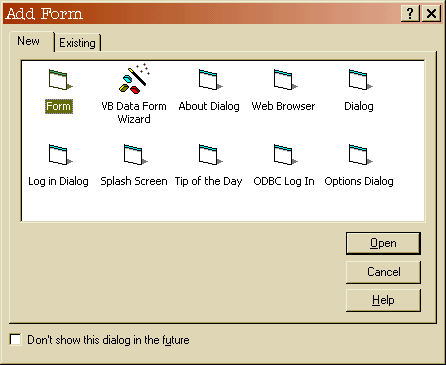
One annoying thing is that most of the forms' default names use Microsoft's
silly "Hungarian Notation" (the Gabor sisters should sue) naming convention,
beginning with the letters "frm". Fortunately, the names are easy enough to
change.
Form
A standard, blank form; this is the substrate on which all the other
forms listed are based.
About Dialog
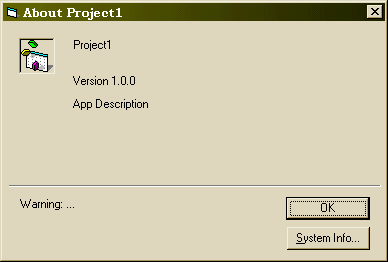
This dialog obtains its information directly from your running project,
so you don't have to do much to it to add About Box capability to
your project. However, the icon doesn't change automatically; and
not every programmer feels the need to devote nearly as much space
to warning the users as to telling them what they are running! Also,
the System Info button provides a useless, and complicated, feature
that you probably won't want.
VB Data Form Wizard
A nice idea, but this wizard doesn't recognize the new format of
Access 2000 databases…so what the heck good is it?
Web Browser
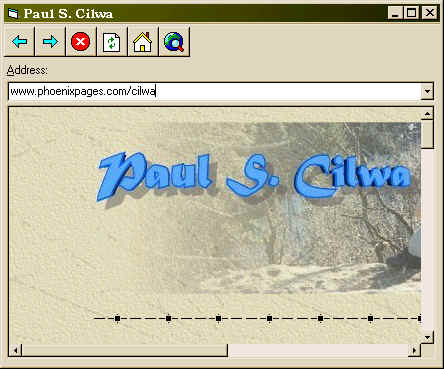
Amazingly, this form creates a complete Web browser! It uses Internet
Explorer technology, and is part of the reason IE must be present in the
Windows operating system even if your preferred browser is Netscape
Navigator.
When you add the form to your project, its MDIChild property
is set to True; if you don't wish to use it that way, you can
easily change it to False. Also, there is a Show method
invocation in the form's Load event; so you may need to tweak the
code for your own usage.
Dialog
Hardly worth it; this pre-designed form contains OK and Cancel
buttons, but no code to make them work. Still, most dialog do have
these buttons; so using this form could save you 30 seconds or so.
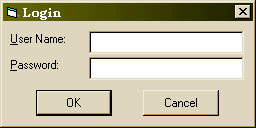
Login Dialog
A standard login dialog; you'll have to add the password-validating
code, but other than that, it's all there for you. After showing the
form modally, read its LoginSucceeded property to determine
whether to proceed.
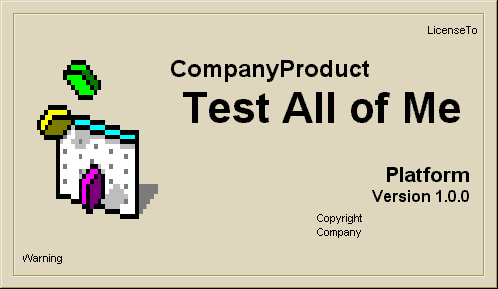
Splash Screen
This one is ridiculous. It obtains some, but not all, of its
information from the running project; so you still have to make
modifications to it. It has no internal timer, but includes code
(that you'll have to remove) to remove the splash screen when the
user clicks on it or the keyboard. That allows the user to remove it
while the application is still initializing. And, speaking of
lengthy initializations, there is no built-in progress bar. But, not
to worry; there is a label supplied for the ever-present
disclaimer.
Tip of the Day
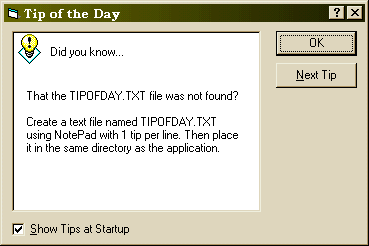
A nifty little form that works! You supply a text file containing as many
"tips" as you like, one per line. The form displays them at random.
It even includes a checkbox for turning tips off, and stores the
state of the checkbox in the system Registry.
You might like to make the name of the tip file a property of the
form, to make changing it at runtime easier; it would also be a good
idea to expose that checkbox value as a property, so that it could be
reset by an option dialog in the main application.
ODBC Login
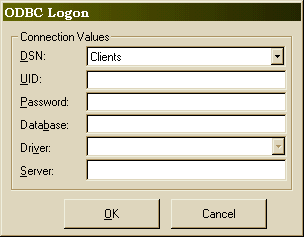
This one seems to work. I work with Access databases, mostly; so I
haven't had a chance to check this thoroughly. Yet, it comes up
cleanly with a list of the various data sources on my computer. I
would certainly plan to use this in an ODBC project.
Options Dialog
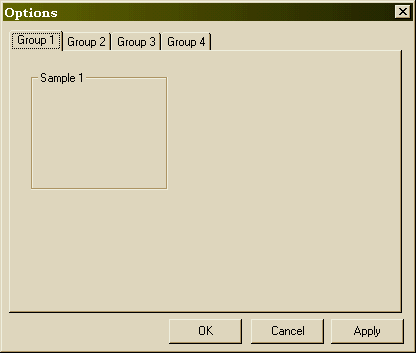
This dialog uses the dreaded TabStrip control, which is
not the easiest way to create a tabbed dialog. The TabStrip
control is only the tab strip; the body of the "tabs" (the sub-forms) is an array of
picture boxes, each with its own child forms, and you (the designer)
can only see and work with the one on top.
I recommend you not use this stock form; create one yourself
with the Microsoft Tabbed Dialog (SSTab) control. Trust me, it'll save
you a ton of headaches.
Properties
Every object in Visual Basic—and every object in the Universe—has certain
quantitative properties that are shared by all objects of that type,
tough the actual values may differ from object to object. For example,
all cars have a color property, but the color itself may be different
from car to car.
In Visual Basic, objects of different types may have some properties in
common (both a house and a car have a color property) and some properties
that are distinct (a house has a mailbox property, but a car does not).
We've already seen project properties, which are set by a
special dialog box. Other properties are set by a common Properties
Window. This window displays the properties of whatever object
you've selected. For example, if you've clicked on a form (in a spot
where there are no controls), the properties window will display the
properties of the form. If you click on a command button, it will
display the properties of a command button; and so on.
Important Form Properties
Among the properties that forms have, there are several that you will work
with again and again. Let's look at some of these:
(Name)
All objects in Visual Basic, including forms, have a Name property.
You'll notice that, in the Property Window, the Name property is placed
within parentheses. That's to make it appear at the top of the list of
otherwise-alphabetically-listed properties. It appears at the top because, of
all the properties, it is the most important and the one you are most likely to
change.
The name of the form (or, indeed, the name of any object) is used to access
the object, later, programmatically.
Microsoft has a fixation with a naming standard called "Hungarian Notation"
and, accordingly, likes to prefix the names of all forms with "frm" (for
example, "frmFrame"). I find this to be a waste of letters and I don't recommend
it.
Caption
This property supplies the text seen in the caption bar at the top of a form.
It defaults to be the same as the original name of the form, which you are
surely going to change; you generally want to change the caption, too.
The caption for an application's frame window is usually the name of the
currently-opened document, followed by the name of the application. This has to
be set at run-time, of course, since you can't know in advance what document the
end user will have open! So, this property is generally set to some neutral
value (like the application name) for frame windows.
Dialog captions are usually fixed to be the name of the command that opened
them (like "Open File" or "Project Properties"). These are usually set at
design-time.
BorderStyle
This property may have one of six values: None, Fixed Single, Fixed
Dialog, Sizable, Fixed ToolWindow, and Sizable ToolWindow.
None will draw no border at all around the form. This is rarely used,
but you might choose it (in combination with a WindowStyle of
Maximized, to create a screen-saver type of application.
Fixed Single and Fixed Dialog actually look exactly alike.
However, in earlier versions of Windows they were drawn differently, and might
be again, someday; so you should use them appropriately: Fixed Single for
an application frame window, and Fixed Dialog for dialog boxes.
Sizable is used for application frame windows that can have their
sizes changed by the end user.
Fixed ToolWindow and Sizable ToolWindow values are used for
forms that will be used as floating toolboxes and toolbars.
ClipControls
In the old days, when personal computers were much slower than they are
today, users could actually see a form be painted: First the background
was erased, then each control was drawn. However, when the background was
painted, the controls were momentarily erased; this looked weird. Setting the
ClipControls property to True (its default) solved this problem by causing the
form to erase only the portions that were not covered with a
control. Of course, it took a little longer to do this, because the erasing
mechanism had to figure out where the controls were, and construct a logical
cutout for each one.
These days. computers and video cards are so fast you really can't see the
effect either way. By setting this property to False, you can speed up
your application's drawing ever-so-little.
ControlBox
This property, which may have a True or False value, indicates
whether there should be a control box button on the left end of the caption bar.
This button, which presents itself as a small version of the application icon,
is used to access the control menu.
The Startup Object
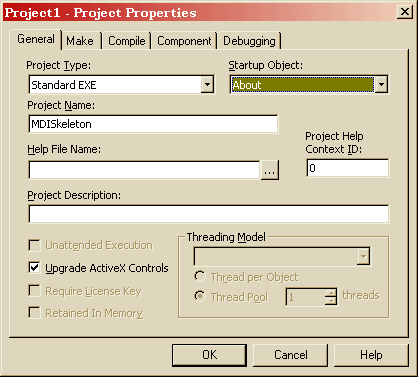
Any computer program must have a way of telling the computer where in that program, when it
is loaded, execution should start. Some languages (like C) use a
specially-named block of code. Visual Basic can do that, too; but usually
execution starts by loading one of the forms, which then controls the rest of
the application.
If you prefer to start execution with code—often done, but I don't
recommend it—that code must be a subroutine named Main and must be
located in a code module.
Whether you want execution to start with a form or in code, you have to let
Visual Basic know. You do that by choosing the Project..Properties menu
command and selecting the name of the form you prefer from the list marked
"Startup object".
Test Driving Your Application
Even though your "application" currently consists of just one form, it is
still an "application" and you can run it. This is typically done, at this
stage, for testing purposes.
To test run your application, use the Run..Start command from the
menu, or click the Start button on the toolbar (it looks like the play button on
a VCR, a right-pointing arrow).
You can always tell your application is being test run, because Visual
Basic's caption bar will say "[run]".
If your application doesn't yet have a proper shut-down mechanism (and ours
does not), to stop it, choose Run..End or click the End toolbar button.
That will instantly stop your application and return you to design mode. You can
always tell you are in design mode, because Visual Basic's caption bar includes
the word "[design]".