|
By: Paul S Cilwa |
Posted: 3/15/2007 |
|
Page Views: 4,639 |
| Hashtags: #Photography #DigitalPhotography |
| How to digitize your photo and slide collection before the pictures fade any further. |
| Estimated reading time: 8 minute(s) (1669 words) |
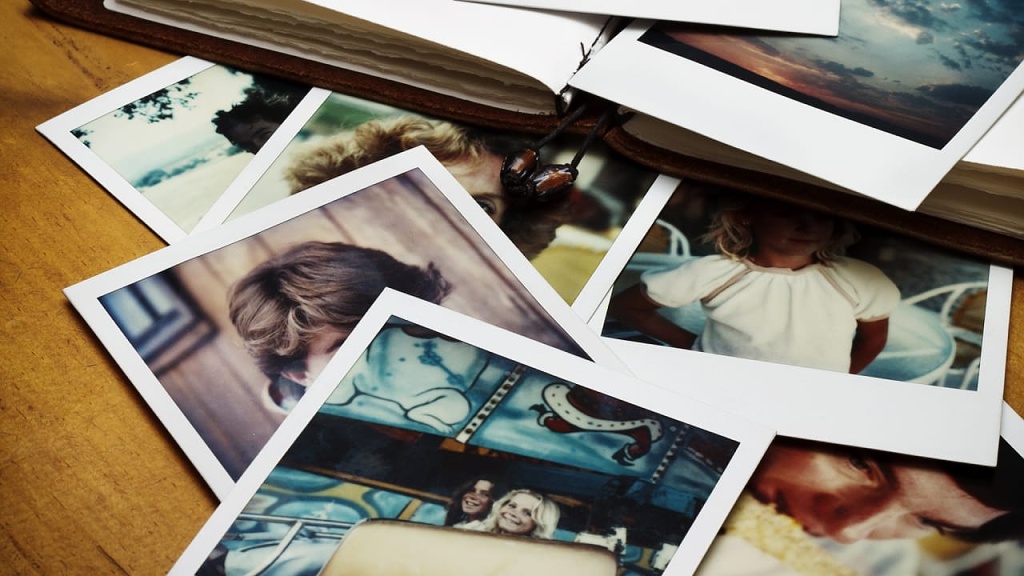
Even so, you know they're there; and that alone can spark a memory of
a treasured photograph or a particularly beautiful slide.
But are they there—really? The dyes that make up color images have been
fading in the years since you had them developed, causing color shifts (where
the yellows, for example, remain bright but the other colors fade, leaving a
strong yellow cast to the image). Black and white images are more stable, but
even they fade with time; and both color and black and white negatives are prone
to damage from dust and scratches, and some color slides actually attract
colonies of fungus that can obliterate a priceless picture.
What's a photo lover to do?
Until a few years ago, nothing could be done. But now your photos and
slides can be digitized, meaning they can be turned into computer files,
in which form they can never discolor or become scratched or infested with
fungus. The common name for this process is scanning.
But what if you aren't particularly fond of computers? Well, that's what this
essay is here to address. 'Cause you probably have a computer, or plans
to get one, or a relative with one. And this job has to be done now,
before your precious photos can deteriorate any more than they already have.
The first step is to gather your photos together. Clear a table, and bring
those boxes of slides in from the garage or hall closet, those albums from the
bookshelf. You're especially fortunate if you still have some (or all!) of the
negatives that made the prints in those albums, because negatives contain more
information than prints, and can usually make higher-quality scans.
Next, organize your photos by decade—this will help both to break the work of
scanning into manageable pieces, and to assist you in organizing the scanned
image computer files when you have them.
Now you have to decide: Who will scan these? If you don't own a scanner, the
answer is simple: Someone else! But even if you do have a scanner, you may choose
to farm out at least part of the work.
The reason is that high-quality (and high-priced) scanners exist that do
especially effective jobs, not only of scanning slides and negatives, but of
repairing them as they are scanned! Such scanners make use of what is
called Digital ICE
(Image Correction and Enhancement), a set of technologies that
locate imperfections in a color image and compensate for them. For example, a
dust mote can be hidden by interpolating the picture around it, so that a good
estimate of what the mote is covering can be generated automatically, making the
dust mote effectively invisible. The same thing can be done with scratches.
Unfortunately, Digital ICE currently can only be applied to color
negatives and slides; but since the majority of photos take one of those two
forms, that's a great help right there.
Now, you can certainly buy a scanner that incorporates Digital ICE; many
hobbyists do. Just remember:
It will only be cost-effective if you have thousands and thousands of
negatives and slides to scan.
There's a learning curve involved in discovering how to make optimal
use of such a scanner.
It takes a lot of actual time to do the scanning, especially
of that many photos.
So, it may be to your benefit to send your slides and negatives to a
professional for scanning. There are many such places listed on the Internet
(Google "scanning photos negatives"). Make sure you see "Digital ICE" somewhere
on their web site. I cannot recommend using a drugstore or discount store
service, as I have always gotten inferior results. (I use
Memories Renewed, and have
always been happy with their work. Once you find
a place that does a good job for you, you tend to stay with them.)
If you've kept your negatives, you probably have the prints as well. Keep
them aside for emergency use: If a negative is particularly damaged, or missing,
you can still scan the print.
You can farm scanning your prints out as well, but Digital ICE doesn't work on
prints so there's no real advantage to doing so if you have a standard
scanner. (Good scanners can be purchased for well under $100.) In tomorrow's
essay I'll cover what you need to know about scanning.
I recommend you do the scanning of your pictures in batches. That keeps both
the cost, time, and scope of the job from overwhelming you. If you've been able
to organize your photos into decades (or even years!), so much the better—just
let a decade equal a batch and get on with it.
Having cleared your table to accommodate the original photos, slides and
negatives, you'll also need a place in your computer to store the digitized
versions in. If you are using the Microsoft Windows operating system, you
already have a My Pictures folder (it's a subfolder of My Documents).
Users of other operating systems can simply make one.
Within My Pictures, I recommend creating sub-folders for each year; it
makes individual pictures so much easier to find later. In some cases, for
example Grandma's old tintypes and early photos, it may be more practical to
name a folder for a range of years. In my case, I have folders named
1850-1950, 1951-1957, 1958, 1959, etc. (I was born in
1951; hence the division between the pre-Paul pictures and the with-Paul
pictures.)
Within each of the year folders, I create further subfolders for dates and
events. For example:
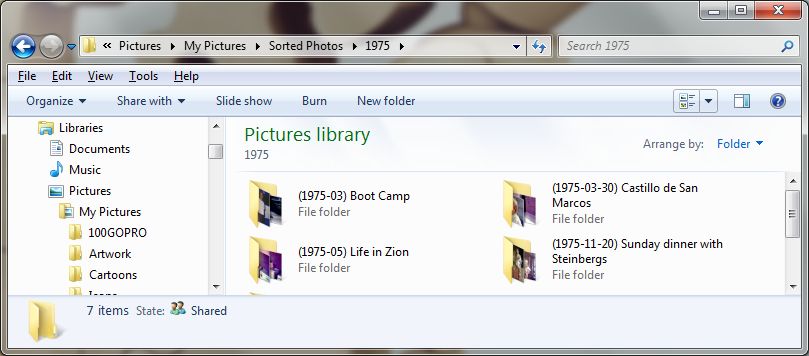
Notice the formatting for the date: YYYY-MM-DD. This will
automatically sort the folders by year, month and day. Also notice that I
don't always know the exact date; I can usually narrow it down to a
month, though, based on whether there's snow on the ground or the
trees are turning or other clues. Generally, people work their way
through a roll of film, taking several pictures at once and then
several more days or weeks later. If your photos are still in the
original envelopes from the drug store, they are chronological but
grouped by film roll. Now, in the computer, you can more logically
group them by event.
Whether you farm out part of the job or not, your images will come back to
you with meaningless names (such as "Image00002" or "Pic032"). It's unlikely
that the numbering scheme will have any relevance (I'll explain why tomorrow,
but take my word for it, for now). So you really are going to need to name each
photo. I recommend using descriptive names, and where people are in the photo, I
use their names in a right-to-left, top-to-bottom order. It isn't necessary to
repeat the date of the photo if it's in the folder name. But I do
recommend preceding the descriptive name with a number (which I put in
parentheses). This is for the dual purpose of ordering the photos, and allowing
the same description to be applied to several photos in the same folder.
For example, if you visited, say, Grand Canyon and took 20 photos of it the
same day (not at all unreasonable), odds are you don't really remember
what, exactly, each photo is of, in spite of the fact that each peak and valley
in the Canyon has been given a name. That's fine. You might have the following
names in the folder:
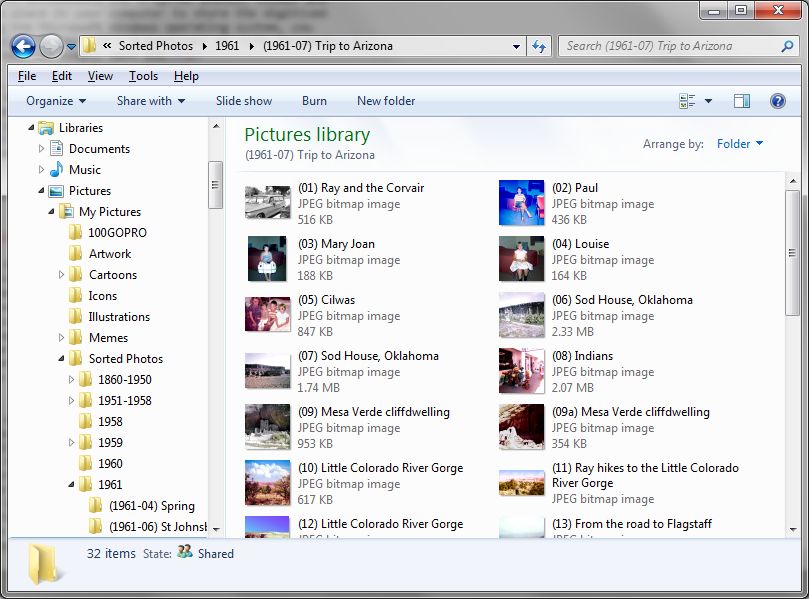
The leading zero in the number is to allow proper sorting of
two-digit numbers. If, for some reason, you have a hundred or more
photos in the same folder, you'll need two leading zeros in
the beginning, to allow proper sorting.
If you do your own scanning, you can either place the scan files directly
into the appropriate folder, or into a "work folder" for safekeeping until you
can perform final corrections on the picture (repairing scratches, adjusting
color, cropping, and so on). I don't recommend you let the work folder get away
from you, but there is a logic in doing a bunch of scans, then a bunch of
corrections, followed by the final placing of the images in their destination
folders (which you can think of as "albums").
It is possible to append additional information to your scanned photo files.
File Metadata is a relatively new concept that allows supporting data to be
physically attached to a file, without changing its basic binary format. There
are several stand-alone programs that allow you to append this information on a
file-by-file basis, as well as the newer photo editing programs that we'll be
discussing tomorrow. (In addition, some of this information is supplied by
high-end digital cameras.) This information can identify where and when a photo
was taken—even to latitude and longitude, if you know it—and allows lengthy
descriptions, such as the fact that Aunt Lou was your dad's favorite
sister, or what your mom was actually getting out of the medicine cabinet that
caused her to have such a horrified expression when you surprised her with the
camera.
While you're at it, don't miss the opportunity to scan other images
that may be deteriorating, like pictures you or your kids drew or even ticket
stubs or other items you might normally have placed in a physical album. Believe
me, the image of your ticket to that 1977 Little River Band concert will evoke
as much emotion on your computer screen as would the yellowing stub itself, and
will last longer.