|
By: Paul S Cilwa |
Posted: 10/5/2007 |
|
Page Views: 5,613 |
| Hashtags: #Photography #PhotoRestoration |
| How to digitally restore old photographs: State-of-the-art in 2007. |
| Estimated reading time: 3 minute(s) (546 words) |
Here's a photo for example. This is a picture of my sister, Louise, playing
"dress-up" in one of Mom's old outfits.
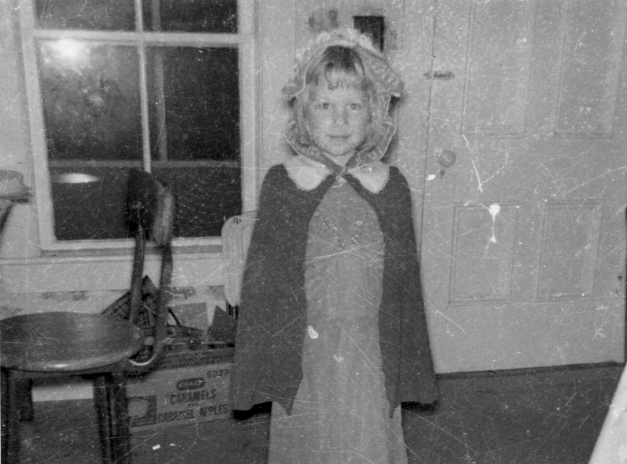
This picture had an interesting history. When I had the original
film processed, no print was made of this negative, probably because
it was overexposed. It was five years or so before I discovered the
negative, its image so faint I could barely make it out. I had the
print made. The drug store did the best they could. The negative
itself has since been lost. The print spent a few years glued into
an album, where it got even more badly scratched.
The image above is the original scan of the photo, scratches and all.
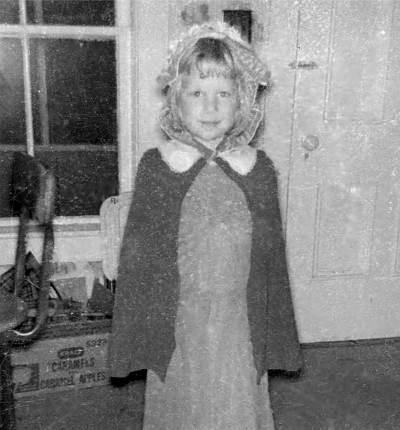
After cropping off the unnecessary edges, the next step was to try and remove as
many scratches as I could. I used Microsoft PhotoDraw's Scratch tool to do this.
It's a manual, tedious process when there are a lot of scratches; I probably
spent twenty minutes on this step.
Next I used Microsoft PhotoDraw's Dust Removal tool to get rid of as many
little spots as possible. I blew the image up to 400% to do this.
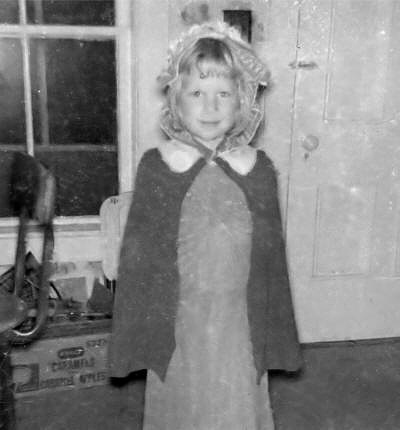
That left, in addition to the image, a number of minor scratches as well as
excessive film grain, due to the picture's having been underexposed to begin with.
In digital terms, this is called "noise" and I have a program called
Neat Image, which is free in
its demo form, which does an outstanding job of
this. That gave me the image on the left. If you compare the two, you'll see the
lower photo is much "smoother". The grain is gone, as well as most of the
scratches. A few big blotches remain, however, especially on the door. Areas of
the window that should be clear are also marred.
It would probably have been possible to attack each blotch individually. But
I don't have that much patience. So instead, back in Microsoft PhotoDraw, I used
the Cut Out tool to make copies of each door and window panel. I then made those
copies blurry (using the Blur/Sharpen tool) and pasted them on top of their
original locations. That
gave me this final version.

Of course, this still isn't "perfect", but it's as good as it's going to get
without enough effort to experience diminishing returns. And in terms of picture
quality, I think it holds up well in comparison to other candid snapshots taken
by nine-year-olds of the era.
Besides, its main purpose is to remind my sister and me and our families how
cute she was when she was seven and, without the distraction of the scratches
and grain, I think it now serves that purpose.